목차 ..
도메인 & 호스트네임 구분
dns, 네임서버 구조
윈도우 마운트 & mysql & tomcat & 워드설치
www.naver.com
1.domain : naver.com
2.hostname: www.naver.com
mail.naver.com
cafe.naver.com
blog.naver.com
kin.naver.com
name server: mail, cafe, blog, kin
nslookup : 네트워크 찾기
> naver.com
서버: kns.kornet.net
Address: 168.126.63.1 //네임서버
권한 없는 응답: //알아봐다, 얻어다가 주는거라 신뢰하기 어려븜
이름: naver.com
Addresses: 223.130.195.200
223.130.200.104
223.130.200.107
223.130.195.95
> server 8.8.8.8 // 구글에서 운영하는 네임서버
기본 서버: dns.google
Address: 8.8.8.8
dns: domain name service/system
ip 주소 = 컴퓨터 주소
ip 주소 어려우니까 도메인을 ip 주소로 변환해줌
*정방향: naver.com 묻기
*역방향: ip주소로 묻기
[네임서버 구조]

nameserver - master/ slave 두고 통신 시킴 (2차서버 준비)
www => world wide web
| linux www database sun |
sarag.net |
관리자 마음대로 설정 가능
윈도우 마운트
내컴퓨터 c에 win 폴더 만들고 gif 사진 파일 넣기
버추얼박스 설정- 공유폴더 win 폴더 추가 (이미 d에 있어서 win2로 이름 설정함)
root@psh:/var/www/html/myHOME# mkdir /yes3
root@psh:/var/www/html/myHOME# mount -t vboxsf win2 /yes3
root@psh:/var/www/html/myHOME# cp /yes3/a.png .
root@psh:/var/www/html/myHOME# ls
a.png
df -h //마운트 확인하기
홈에서 cd public_html 만들어서 그 안에서 vi html 하기 or,,
root@psh:/var/www/html/myHOME# vi index.html
1 <meta charset='utf-8'>
2 <body bgcolor=red text=white> <br><br> <h1><center>
3 <hr> <br>
4 안녕하세요. 봉구네 입니다. <br><br>
5 <hr><br><br>
6 <img src='a.png'>
안되면 권한 수정 chmod 755 ~ & systemctl restart apache2
mount 복습
windows ===> c:/mywin
linux Dir ==> /myLinux
**루트에서 html 띄울 때
/var/www/html 에서 index.html
**계정에서 html 띄울 때
홈에서 public_html 폴더 만들고 public.html 파일 만들어서 코딩하기
mysql
***************root 에서 계정 만들기
mysql> use mysql
Reading table information for completion of table and column names
You can turn off this feature to get a quicker startup with -A
Database changed
mysql> alter user root@localhost identified with mysql_native_password by 'jj';
Query OK, 0 rows affected (0.01 sec)
mysql> create user mygold@localhost identified with mysql_native_password by 'j';
Query OK, 0 rows affected (0.01 sec)
mysql> grant all privileges on goldDB.* to mygold@localhost;
Query OK, 0 rows affected (0.00 sec)
mysql> flush privileges;
Query OK, 0 rows affected (0.01 sec)
***********gold에서 데이터 넣기
mysql -u mygold -p
gold@psh:~$ mysql -u mygold -p
Enter password:
Welcome to the MySQL monitor. Commands end with ; or \g.
Your MySQL connection id is 12
Server version: 8.0.32-0ubuntu0.22.04.2 (Ubuntu)
Copyright (c) 2000, 2023, Oracle and/or its affiliates.
Oracle is a registered trademark of Oracle Corporation and/or its
affiliates. Other names may be trademarks of their respective
owners.
Type 'help;' or '\h' for help. Type '\c' to clear the current input statement.
mysql> show databases;
+--------------------+
| Database |
+--------------------+
| information_schema |
| performance_schema |
+--------------------+
2 rows in set (0.00 sec)
mysql> create database goldDB;
Query OK, 1 row affected (0.01 sec)
mysql> use goldDB;
Database changed
mysql> show tables;
Empty set (0.00 sec)
mysql> create table Man(name char(20), age int);
Query OK, 0 rows affected (0.04 sec)
mysql> isert into Man values("손흥민",32);
ERROR 1064 (42000): You have an error in your SQL syntax; check the manual that corresponds to your MySQL server version for the right syntax to use near 'isert into Man values("손흥민",32)' at line 1
mysql> insert into Man values("손흥민",32);
Query OK, 1 row affected (0.01 sec)
mysql> insert into Man values("이강인", 23);
Query OK, 1 row affected (0.01 sec)
mysql> select * from Man;
+-----------+------+
| name | age |
+-----------+------+
| 손흥민 | 32 |
| 이강인 | 23 |
+-----------+------+
2 rows in set (0.00 sec)
*tomcat
apt -y install tomcat9 tomcat9-examples tomcat9-admin tomcat9-docs
cd /etc/apache2/mods-enabled/
ln -s ../mods-available/userdir.conf
ln -s ../mods-available/userdir.load
systemctl restart apache2
status 로 확인
들어가는 법: 127.0.0.1:8080/manager
*워드 설치
Download – WordPress.org 사이트에서,,,
wget & tar xfz 다 풀고
cd /var/www/html
mv ~/wordpress/ .
ls
mv wordpress wp
cd wp
ls
ai php
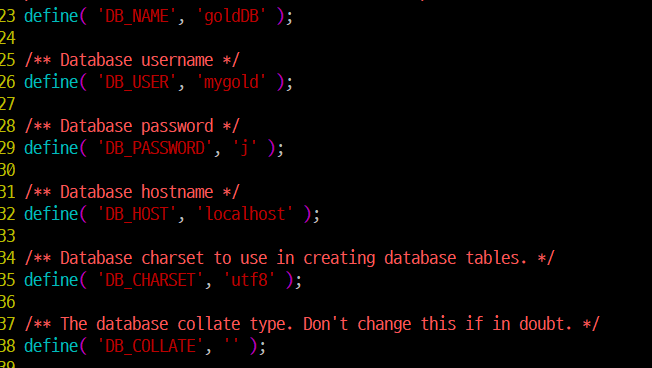
cp wp-config-ssample.php wp-config.php
vi wp-config.php // id에 맞게 수정

sudo apt-get install php-mysqli
systemctl restart apache2
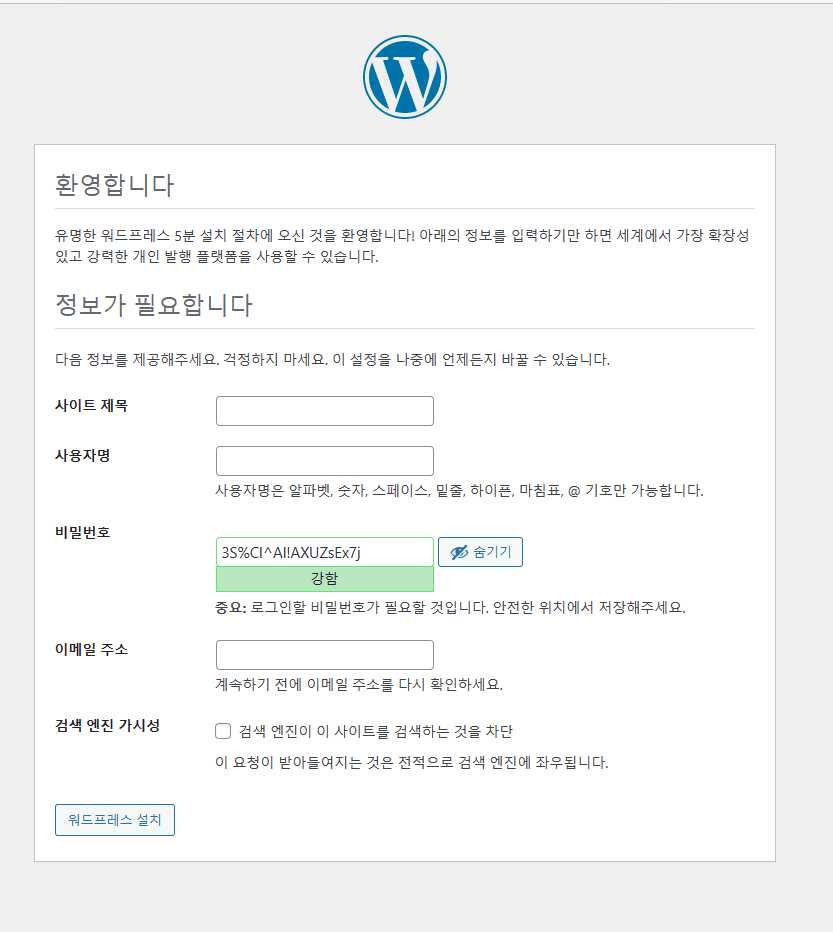
결과창 127.0.0.1/wp

'[네이버클라우드] 클라우드 기반의 개발자 과정 7기 > 리눅스' 카테고리의 다른 글
| [리눅스] 표준 입력방식과 일반 실행의 차이 ,,!! (0) | 2023.05.03 |
|---|---|
| 7일 차 ,, bind (0) | 2023.05.03 |
| 일반 파일 실행과 systemctl 실행의 차이 (0) | 2023.05.02 |
| 데몬과 파일의 차이 (0) | 2023.05.02 |
| 6일 차 근로자의 날에도 학원은 안 쉰다 (4) | 2023.05.01 |